Painting pumpkins for Halloween? What a great idea! All you need now is some inspiration for how to create a spectacular display this year!
Here are a few things you should know before starting to paint your pumpkins!
Make sure you use paint that will stick to the pumpkin surface, not all paint varieties are suitable to use for pumpkins.
Before you begin, cover everything including yourself with protective film or paper, to make sure you don’t spend more time cleaning up than painting.
Clean the pumpkin properly before you commence – the surface of the pumpkin should be nice and clean without any imperfection. Feel free to use some sandpaper if you feel like you need to smooth out a few corners to make it look more polished.
If you’re applying a number of layers of paint or stencil on top of painted pumpkins, make sure you leave it dry somewhere protected from the wind that might blow mess on your drying paint.
If you want to paint your pumpkins with kids, check some of the finger paint ideas in our selection – they are ideal to get kids involved without creating too much mess.
Are you ready to get inspired for your quest?
27+ Painted Pumpkins Ideas
There are a few ways you can approach painting pumpkins.
You can use stencils which will produce a design that looks more professional and much faster to do, or just give it a go at freehand painting if you have something very specific in mind.
In either case, we have compiled a selection of designs and creations for both options.
Save your favorites in Pinterest and get creative!
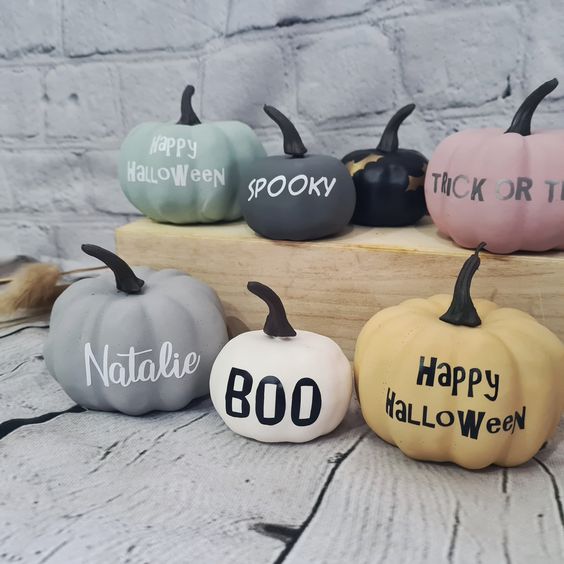
1. Personalized Small Painted Pumpkins
2. Rainbow Pumpkins

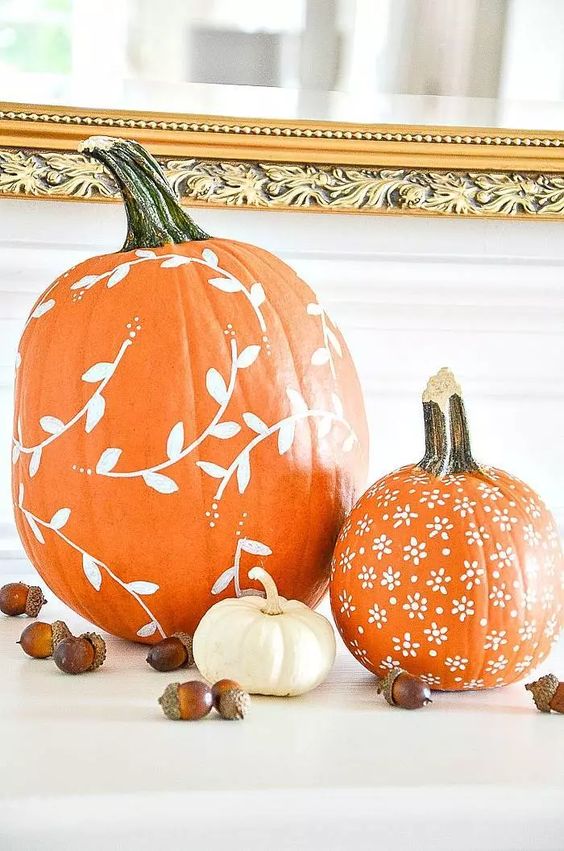
3. Pretty in Orange
4. Monochrome Pumpkins
5. DIY Chinoiserie Painted Pumpkins
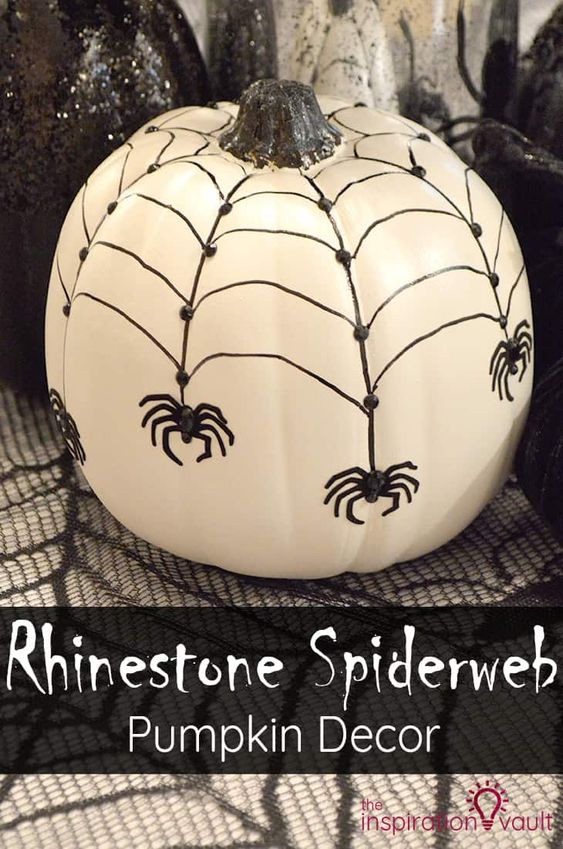
6. Spiderweb Pumpkin
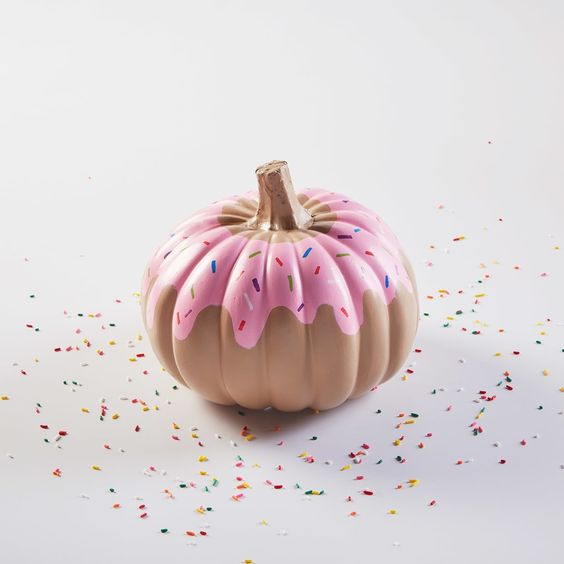
7. Donut Painted Pumpkin
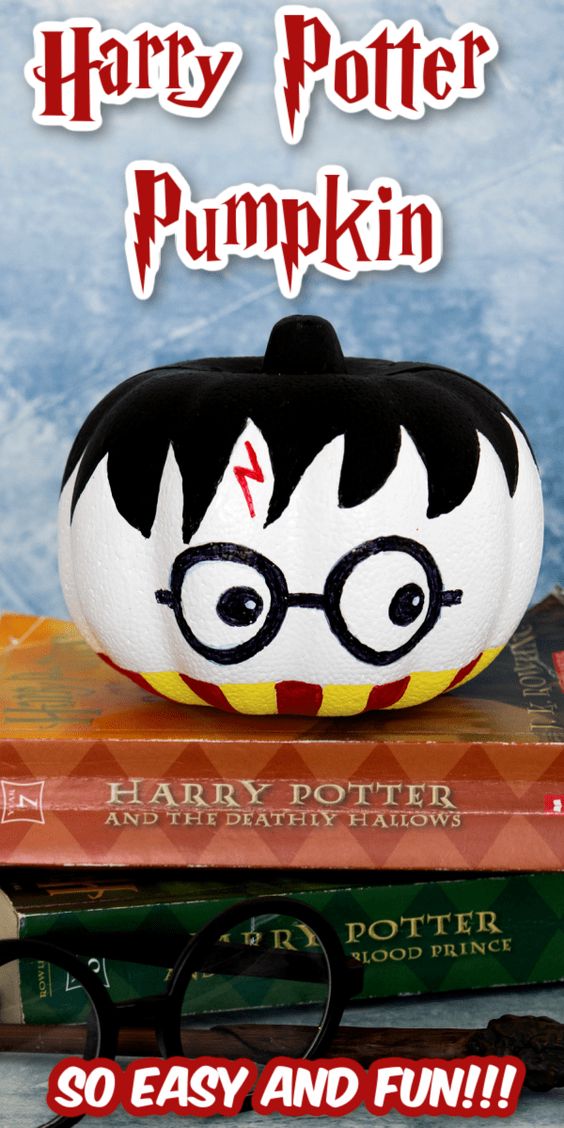
8. Harry Potter Pumpkin
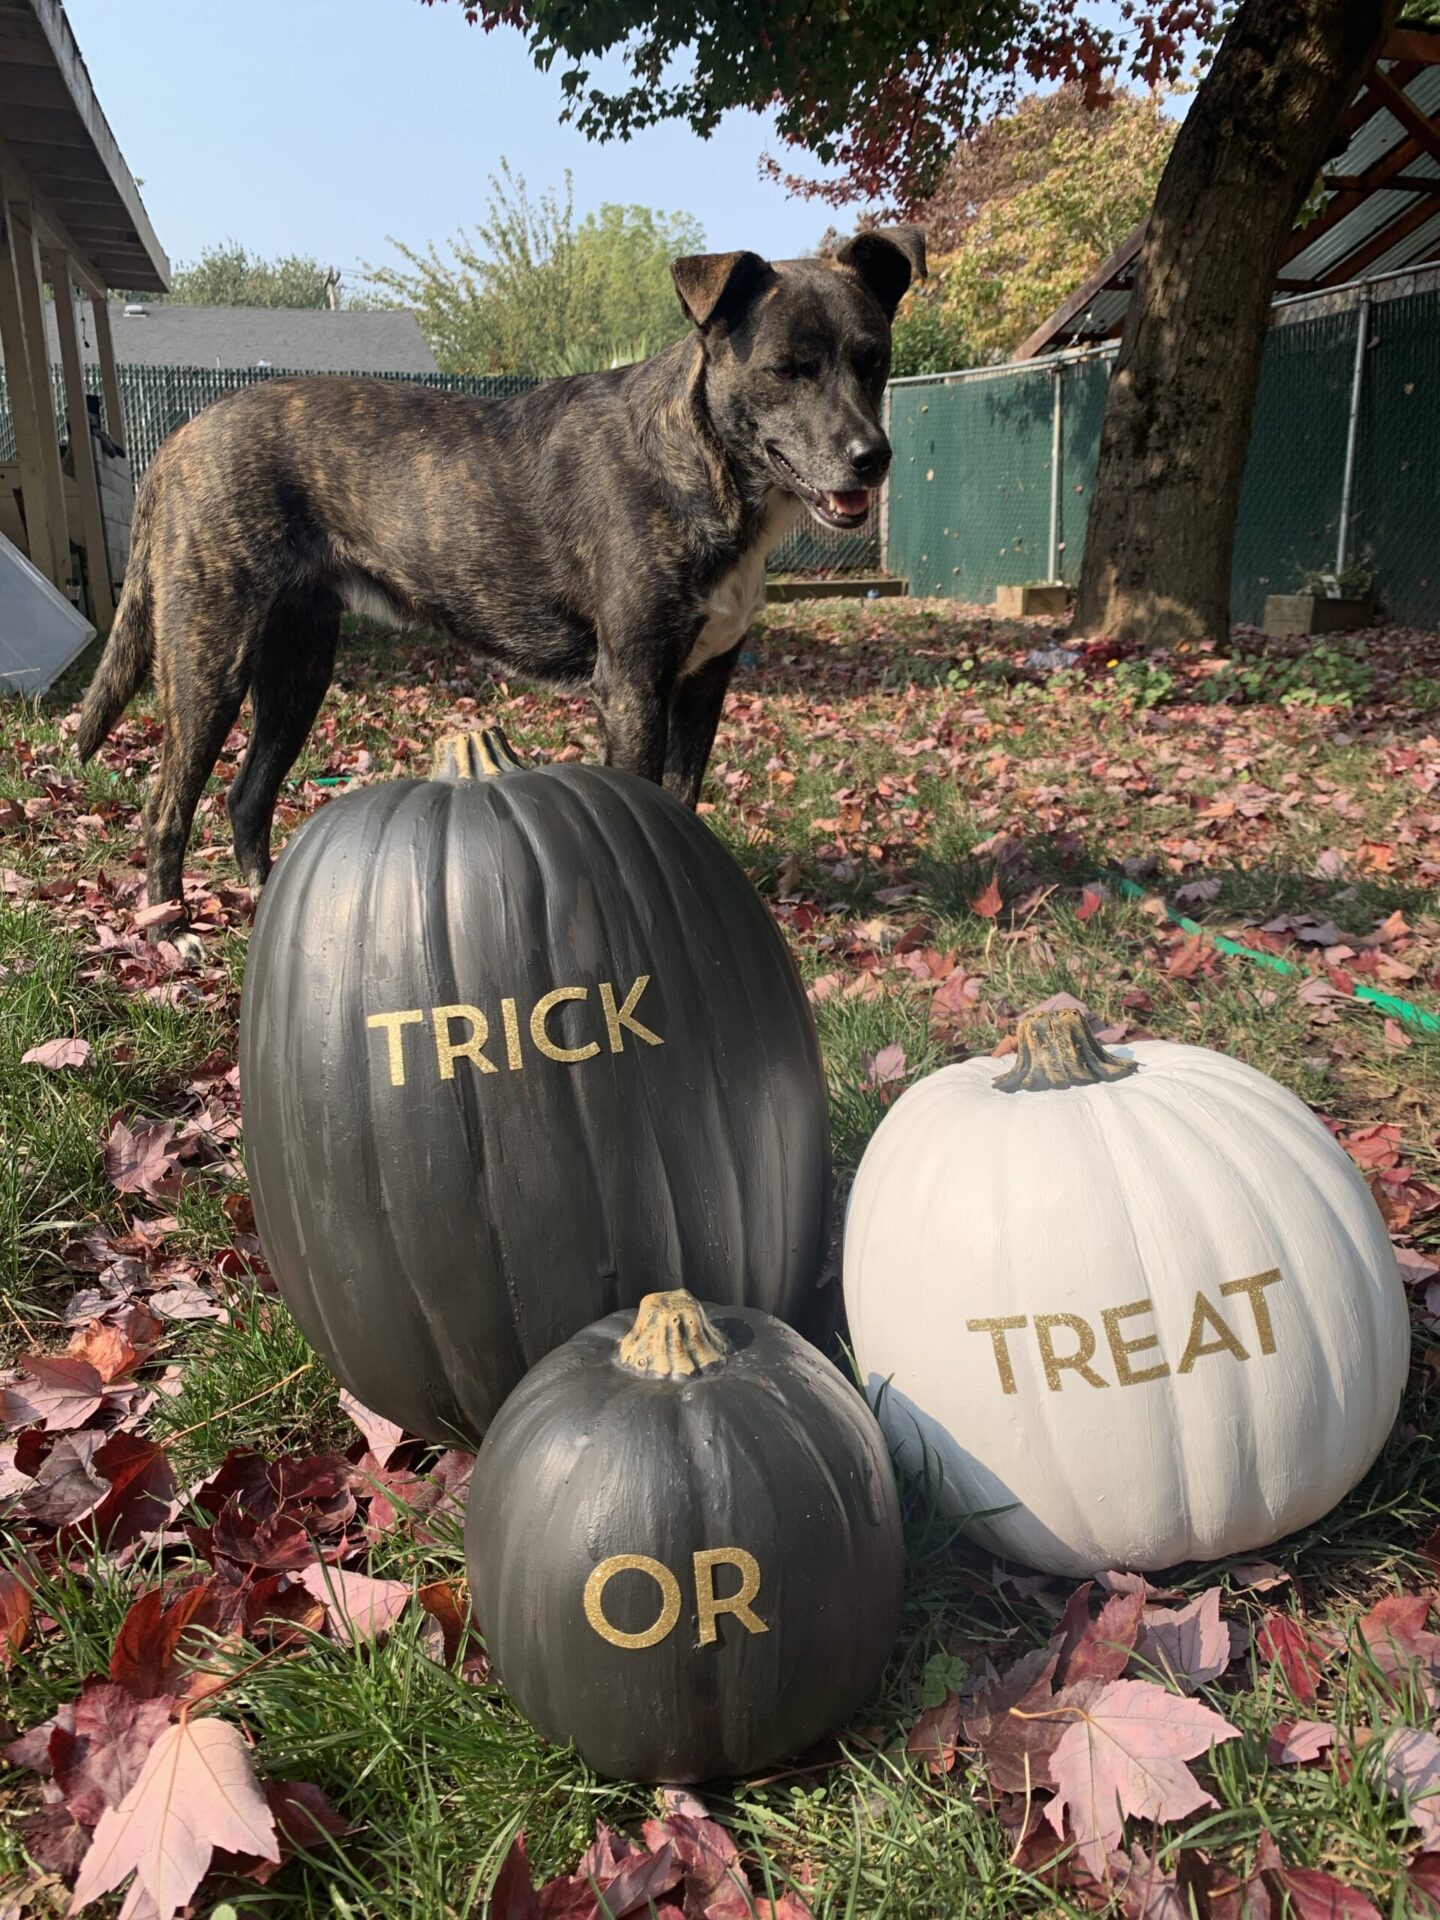
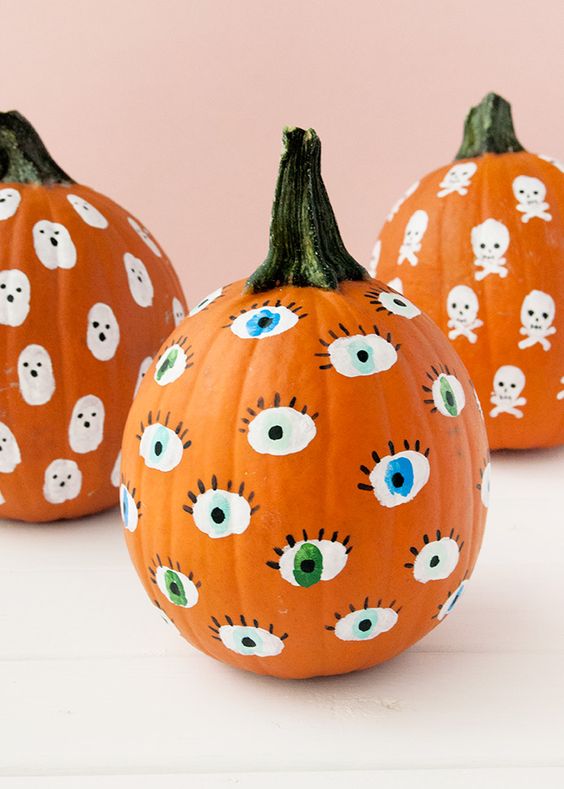
9. Trick or Treat Pumpkins

10. Glittery Spray Paint

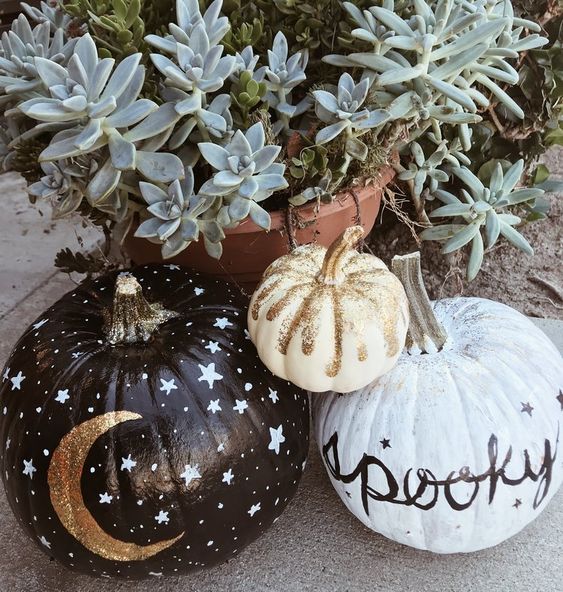
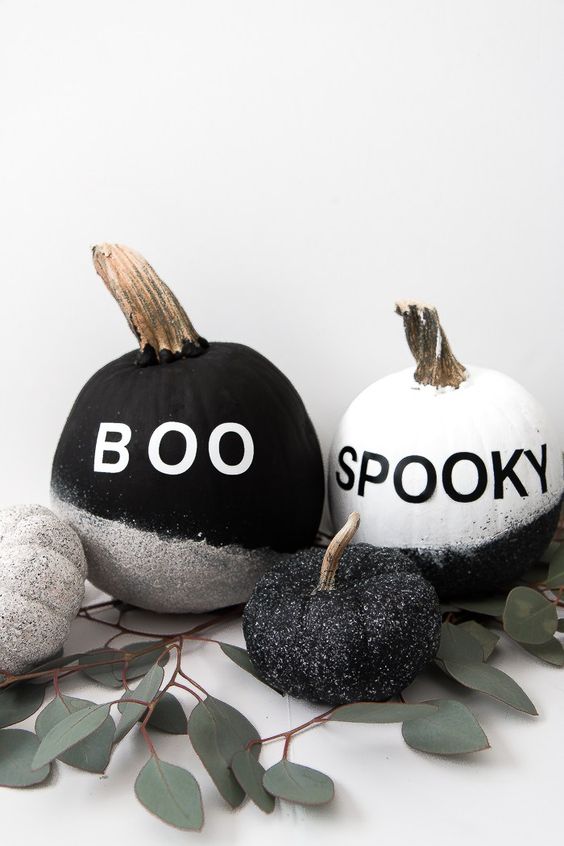
11. Black & White Pumpkins

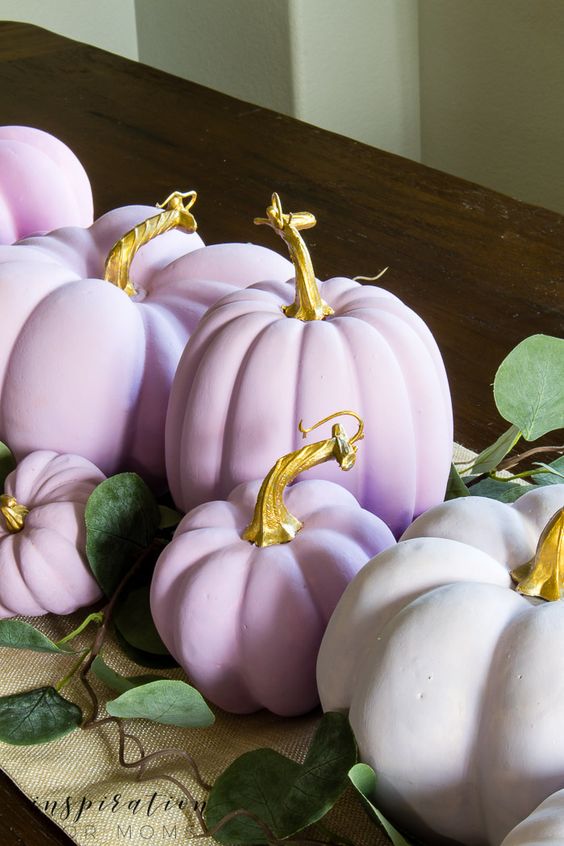
12. Neutral Halloween Pumpkins
13. Porcelain Pumpkins
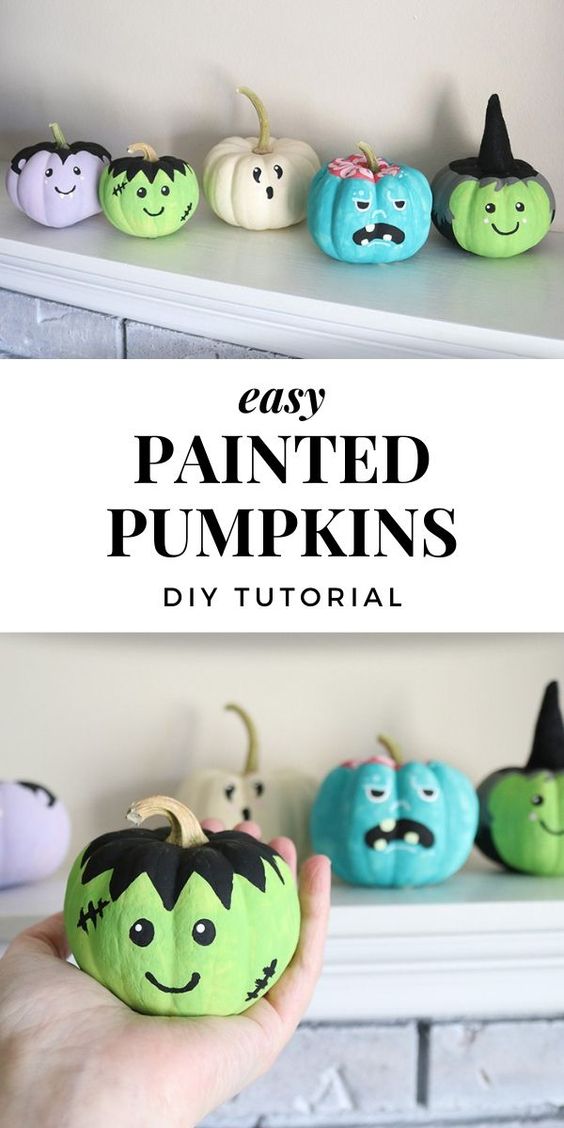
14. Easy Painted Pumpkins
15. Trick or Treat Pumpkins
16. Artsy Painted Pumpkins
17. Gold Glitter Pumpkins

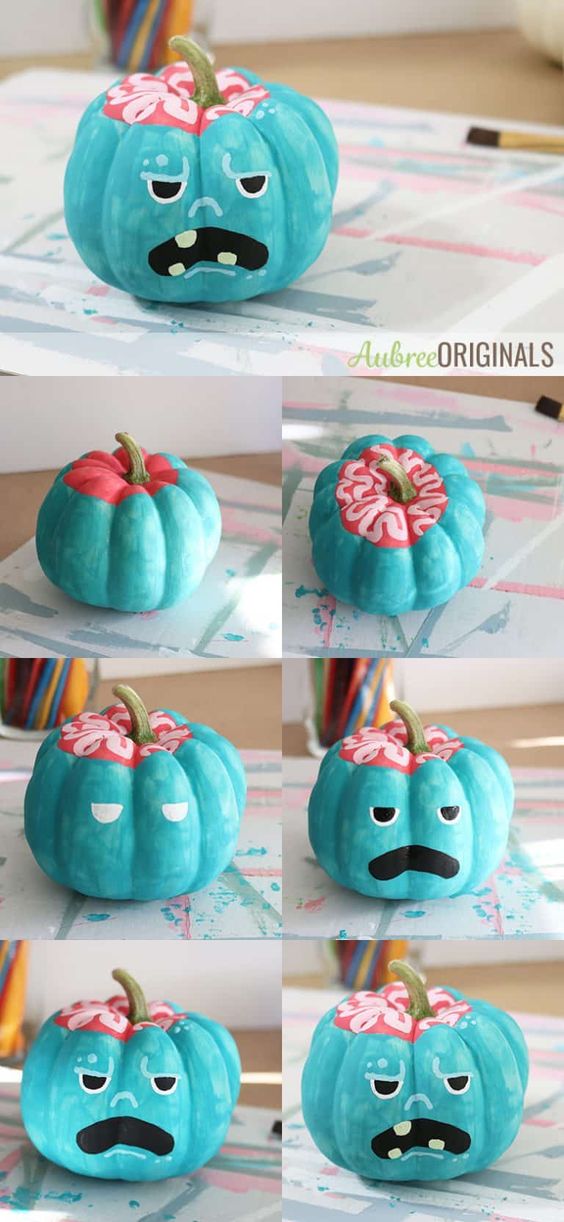
18. Monster Halloween Pumpkins
19. Drip Painted Pumpkins

20. Sharpie Pumpkins

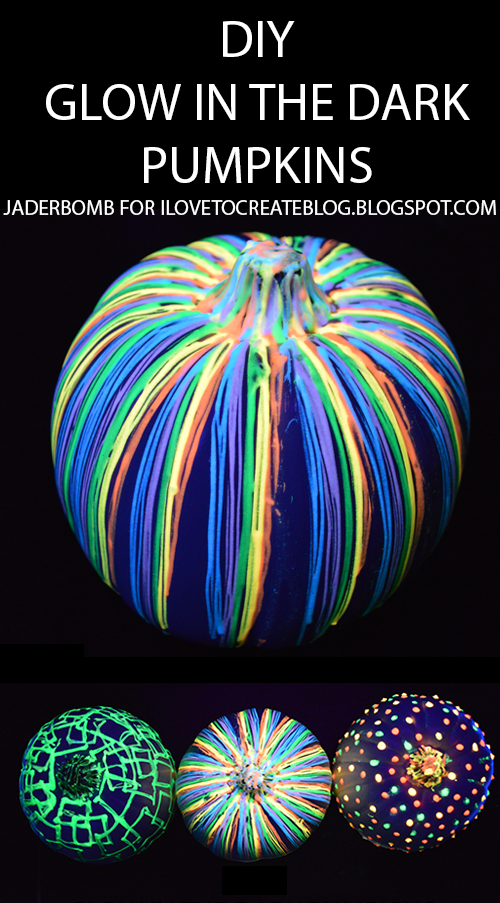
21. Glow in Dark Halloween Pumpkins
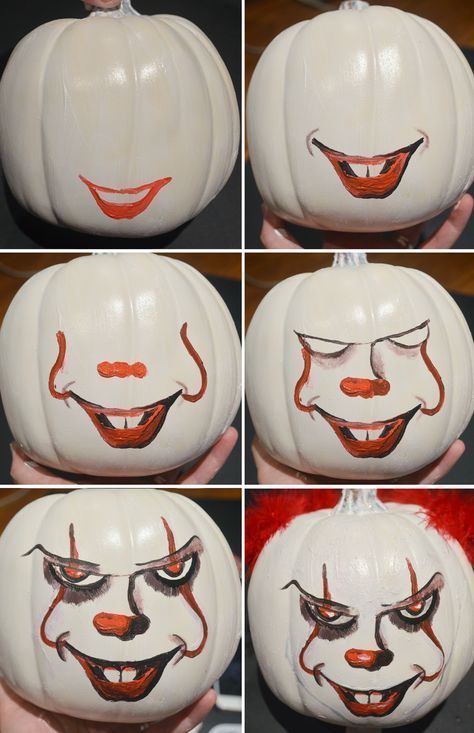
22. Joker Pumpkin
23. Finger Painted Pumpkins for Kids
24. Ombre Pumpkins
25. Funky Halloween Pumpkins

26. Monochrome Halloween Pumpkins
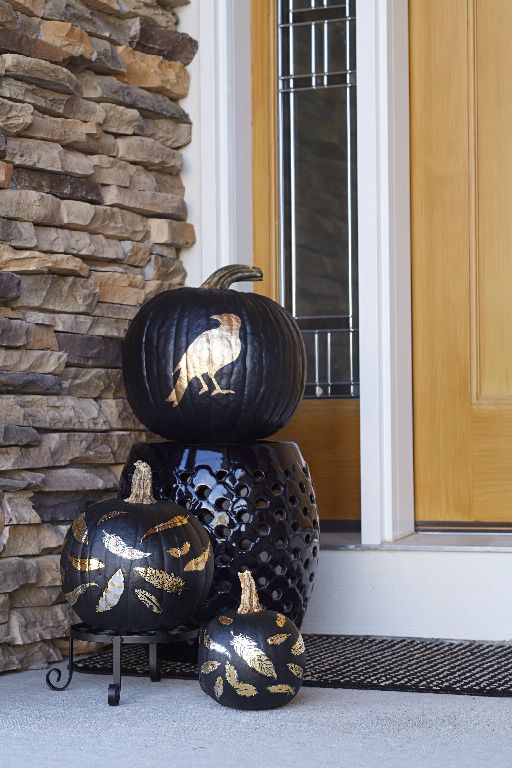
27. Black & Gold Halloween Pumpkins
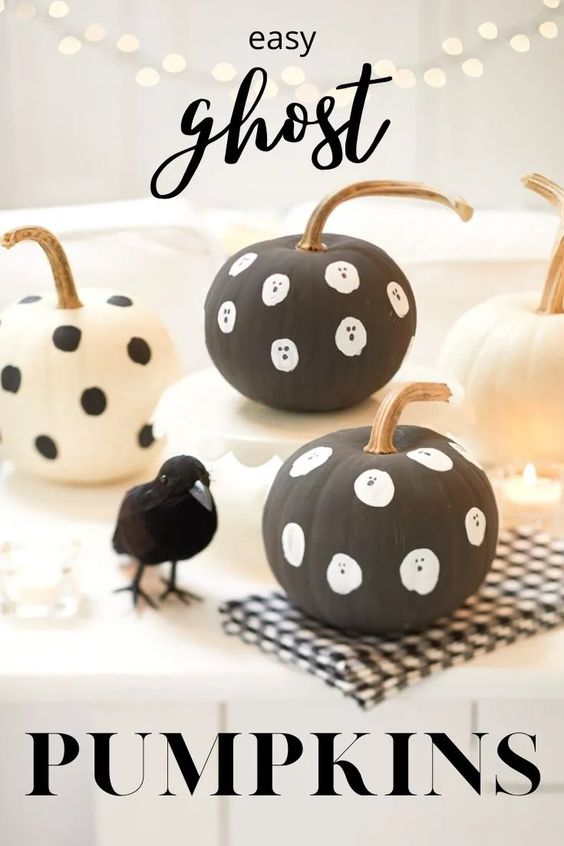
28. Ghost Pumpkins
29. Easy Happy Halloween Pumpkins
30. Abstract Mountain

31. Chinoiserie Inspired

32. Glowing Constellation

33. Confetti Mini Pumpkins

34. Disco Ball

35. Concrete Pumpkin

36. Buffalo Plaid

37. Glittery Pumpkins

38. Pour Art

39. Halloween Black Cat

40. Matte & Metallic Label

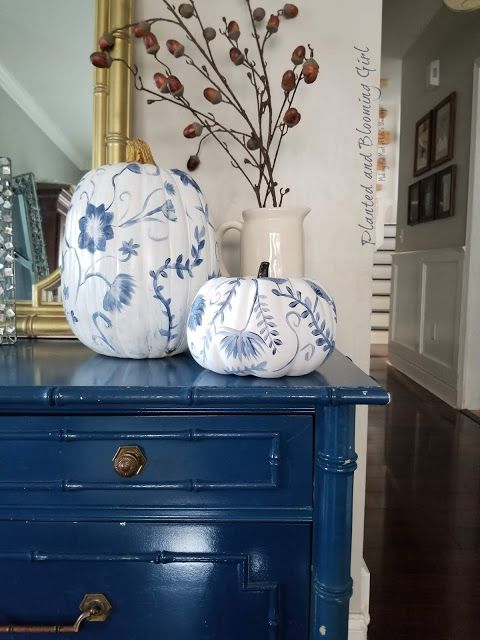
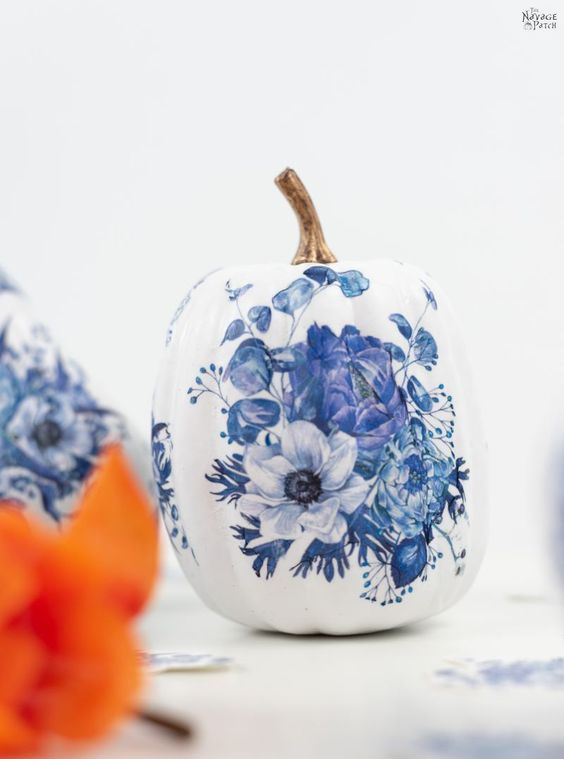
41. Blue & White

42. Pumpkin Ice Cream Cones

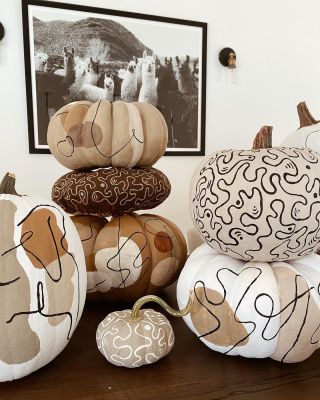
43. Minimalistic Shapes

The Art of Pumpkin Painting
Carving pumpkins is a classic and fun Halloween activity, but it comes with a list of challenges. Working with sharp knives and scooping the slimy guts, it is not always the most kid – friendly or mess free task.
Painting is much cleaner and safer than carving, while it is much more flexible because it can be done on any surface and object. Here’s why you should consider painting your pumpkins this year:
- Safety First: No need for any sharp objects being used in the process which makes the art suitable for kids and adults.
- Creative Freedom: Statues, abstract figures and human figurines that can be made without limitation by the carving tools.
- Longevity: To understand which pumpkins are preferably carved or painted, you should know that painted ones have a longer life in comparison with carved ones since they don’t rot as fast.
- Mess-Free: No more pumpkin seeds and pulp to extract just to make a pie.
Getting Started
Here is a list of the basic supplies that you might need:
- Pumpkins: Select pumpkins without devoid of coarse exterior.
- Acrylic Paints: Pumpkin painting is best done with these paints because they stick on well and do not take long to dry.
- Paintbrushes: It has ranging sizes of brushes – the finer ones for getting into small details, and the broader ones for broad areas.
- Painter’s Tape: They are great when you want to lay straight lines and create patterns.
- Stencils: Ideal for highly detailed designs.
- Sealant: A clear coat so that your artwork does not wear off easily due to environmental conditions.
Preparing Your Pumpkin
- Clean the Surface: You should clean it with a damp cloth to ensure that it is free from mud or any other dirt.
- Smooth It Out: Now and again, you may realize that the pumpkin skin has some areas with some sort of roughness. It is important to gently sand these places to ensure you have a smooth area to paint on.
Design Ideas
Here are some different themes to get you started:
Classic Halloween
Everyone loves the good ‘ol Halloween designs.
- Jack-O’-Lantern Faces: Draw different scary and silly faces.
- Ghosts and Ghouls: White ghosts with black outlines on eye and mouth are very creepy and childish at the same time.
- Witches and Wizards: Coal green and black paints can be a good way to paint fabulous witches or great wizards.
Modern and Trendy Designs
If you’re looking to add a contemporary twist to your Halloween decor, consider these trendy ideas:
- Metallic Pumpkins: Use metallic paints that give golden, silver, or bronze touch to achieve a modern outlook.
- Color Blocking: Paint the blocks in black on white or white on black using basic geometric shapes like squares, circles and rectangles.
- Floral Patterns: Basically, merge two festivities, the autumn one and the floral one, and let Halloween be an interesting addition to it.
Kid-Friendly Creations
Pumpkin painting is a perfect family activity, so make sure to include some designs that are fun and easy for kids:
- Cartoon Characters: This is one versatile idea that you can apply for any occasion or holiday ; let your kids paint their favorite superheroes, cartoon movie characters, etc.
- Animal Faces: Make simple characters such as cats, dogs or owls with rather friendly and simple features.
- Glow-in-the-Dark: Develop an expectation such as painting one or more elements using glow in the dark color to make a surprise when the lights are turned off.
Tips and Tricks
While acrylic paint is somewhat fast – drying, it is more effective to let the previously applied layer dry up and harden before applying a new layer. This will prevent smudging the paint.
- Using Stencils and Tape: In order to achieve clean lines and good design, stencils and painter’s tapes are the right tools to use. Tape the surface properly to prevent the paint from spreading over that area.
- Adding Details: Paint markers are good for filling small intricate details. That means it’s useful for creating those tiny stars, spiderwebs, or any other complex pattern that will make your design truly come off the page.
- Sealing Your Masterpiece: Finally, after you have cremated your pumpkin, use a clear acrylic coat and lock your artwork to be free from both moisture and fading. This is particularly vital if your pumpkins will be cultivated for the outdoors.
Hosting a Pumpkin Painting Party
You can invite your friends and family members to come over and decorate pumpkins together for the fall holiday.
- Invitations and Setup: Send out spooky-themed invitations and prepare a comfortable workspace with all the necessary supplies. Cover tables with newspaper or plastic tablecloths to catch any spills.
- Snacks and Refreshments: Entertain your guests with appropriate Halloween treats The idea is to keep your guests fed and happy throughout the event. Consider pumpkin-shaped cookies, caramel apples, pumpkin spice lattes or witches brew punch.
- Games and Prizes: Make the occasion into a little competition with different categories such as ‘Over and Above,’ ‘Spookiest’ or ‘The Jokester-Pumpkin.’ This way the winners will get a chance to win small prizes to take home.
Displaying Your Painted Pumpkins
Here are some ideas on how to display your art:
Indoor Displays
Display your painted pumpkins on top of mantels, windowsills, or use them as centerpiece decorators. This works well displayed together with other Halloween decorations like candles, spider webs, and artificial autumn leaves to create ambience.
Outdoor Displays
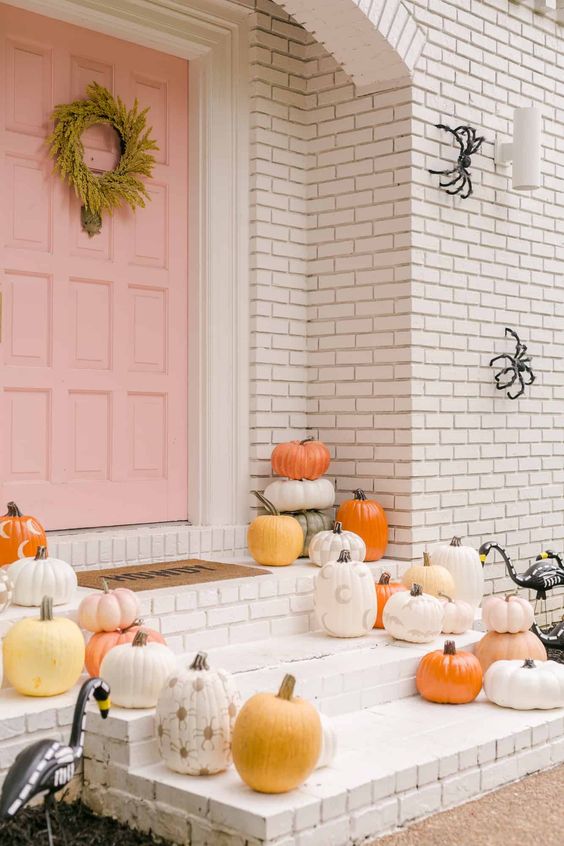
If you plan on using your pumpkins as Outdoor decorations, then place them in a covered area so that they will not be affected by the rain, cold and other bad weather conditions. Arrange them on your porch steps, at the entrance of your house or in your garden to create a perfect Halloween area.
Photographing Your Creations
Well-lit photographs should be taken for painting the pumpkins in all the wonderful ways they were made. The sun is best as it creates a natural light. However, other props like hay bales, corn stalks or lanterns can be used to finish the look.
Conclusion
It is fun and easy to paint pumpkins for Halloween. This turns out to be as fun as carving without the difficulty and the mess of doing so.
A fun activity that could be conducted among children of all ages, starting from toddlers to grandparents and it is very flexible since everyone could come up with different ideas.
Therefore get your pumpkins ready, buy your painting tools, go crazy and create great looking pumpkins that will add on to the merits of the great Halloween celebrations. Happy painting!
More Halloween Ideas:
How to Create the Ultimate Halloween Ensemble
33 + Halloween Mantel Decorating Ideas
30 Fun Halloween Quotes To Celebrate The Fright Night
Partners In Crime: The Best Friends Halloween Costumes
15 Awesome Group Halloween Costumes For Work
15+ Awesome Group Halloween Costume Ideas To Rock This Season
30+ Pretty Ghost Makeup Ideas for Halloween
50+ Spooky Halloween Party Ideas for Kids
40+ Most Jaw-Dropping Pretty Halloween Makeup Ideas
20+ Cool Halloween Pumpkin Decorations That Are Not Orange
Trick or Treat – 15 Creative Halloween Treats for Kids
12 Awesome Halloween Games for Your Hyped Up Kids
Love it? Pin it!


